If you’ve ever sat across from a lab manager, histotechnician, or materials scientist debating how to prep samples for testing—whether it’s biological tissue for histology, metal alloys for fracture analysis, or environmental specimens for microplastic counting—you know the question always comes up: wet vs. dry specimen preparation. As someone who’s spent 12 years in the specimen preparation supply business, I’ve heard that question answered a hundred different ways, often with half-truths or outdated rules of thumb that don’t apply to the unique challenges each lab faces. Let’s break this down not just as a textbook concept, but as a practical, daily decision that can make or break your test results, your turnaround time, and your bottom line. Specimen Preparation
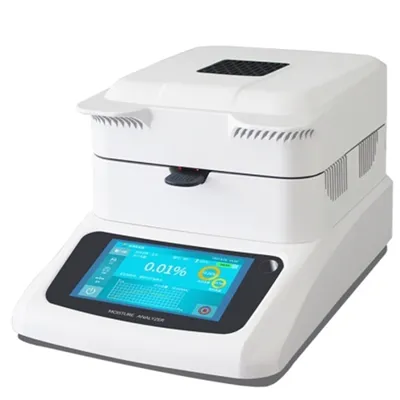
First, let’s get the basics right, no confusing jargon. Wet specimen preparation (sometimes called “wet processing”) relies on liquid-based reagents, solutions, or baths to handle samples through every step of prep: fixing, dehydrating, embedding, staining, or polishing. Dry specimen preparation, on the other hand, uses no liquids at all—it relies on mechanical action, dry powders, air, or electrostatic forces to process samples, leaving them completely moisture-free from start to finish. The key difference isn’t just the presence of a liquid; it’s what that liquid does (or doesn’t do) to your sample’s structure, composition, and integrity.
Let’s start with biological specimens, since that’s the area most people associate with wet prep, and where the line between wet and dry is most obvious. For histology labs, the gold standard for decades has been formalin-fixed paraffin-embedded (FFPE) processing, a classic wet workflow. When you take a surgical tissue biopsy, your first step is immersion in 10% neutral buffered formalin, a liquid fixative that penetrates cells 10 to 15 times faster than air, crosslinking proteins to preserve tissue structure before it breaks down. Next comes dehydration: you move the sample through a series of increasing ethanol concentrations, another wet step, to remove all water from the tissue so it can be infiltrated with molten paraffin wax. Finally, you stain the thin, cut tissue sections with aqueous dyes like hematoxylin and eosin (H&E) to visualize cell nuclei and cytoplasm—all wet steps. I still remember my first year in the supply business, delivering formalin containers to a small community hospital lab, and the histotechnologist pulling me aside to complain about what happened when she tried a dry alternative to formalin for a skin biopsy. The tissue started to autolyze (self-destruct) in 45 minutes, way faster than formalin could fix it, because there was no liquid to halt enzymatic activity. That story stuck with me: wet prep wasn’t just a choice for biological samples—it was a necessity back then, because dry methods couldn’t match the speed of liquid fixatives.
But fast forward to 2024, and dry prep for biological specimens has evolved a lot, especially for specialized work like frozen sectioning for intraoperative cancer margins. Wait, frozen sections—aren’t they wet? No, the actual processing before freezing can be dry, depending on the workflow. Modern cryo-labs use dry embedding media, like cryoprotective powders, that stick to the tissue without any liquid fixative, and you process the sample at sub-zero temperatures in a dry chamber to prevent ice crystal formation. Ice crystals are a huge problem in wet frozen prep, right? When you use liquid fixative, even buffered, water gets trapped in cells, freezes, and punctures membranes, distorting cell structure so pathologists can’t tell cancer from normal tissue. Dry cryo-prep eliminates that entirely, leading to much more accurate intraoperative diagnoses that mean surgeons only remove the cancer, not extra healthy tissue. I worked with a large cancer center in Chicago a few years ago that switched from wet to dry prep for their frozen sections, and they reported a 12% drop in false positive margin calls—no small feat when each wrong call leads to a second surgery for the patient.
Now let’s turn to non-biological specimens, where the balance between wet and dry shifts even more. Take materials science, for example: preparing metal, ceramic, or polymer samples for microhardness testing, SEM (scanning electron microscopy), or EDS (energy dispersive X-ray spectroscopy). For decades, metallurgists used wet grinding and polishing: they clamped the sample to a rotating wheel with a slurry of silicon carbide (SiC) or alumina particles suspended in water, which lubricated the wheel, carried away heat, and smoothed the sample surface. But here’s the catch: that water can cause corrosion, especially for reactive metals like aluminum, magnesium, or lithium. When magnesium alloys are ground with water, they oxidize in minutes, creating a layer of magnesium hydroxide that distorts the hardness and microstructure results. That’s where dry specimen prep comes in: diamond paste applied to a dry polishing wheel, no water, or even cryo-polishing where you cool the sample to -150°C with liquid nitrogen to make soft polymers rigid enough to grind without melting or deforming. I supply dry polishing wheels and diamond pastes to a aerospace parts manufacturer in Texas, and their materials engineer told me that switching from wet to dry prep for titanium alloy turbine blades cut their sample preparation time by 25% and eliminated all corrosion artifacts that used to lead to 15% of their tests being repeated. For industrial metal testing, dry prep isn’t a niche choice—it’s a quality control necessity.
But dry prep isn’t perfect, and that’s where a lot of labs go wrong when they pick one method over the other. Let’s talk about microplastic testing, a rapidly growing field that uses both biological and environmental specimen prep. For water samples, wet prep is standard: you filter water through a membrane, then soak the membrane in a detergent solution to separate microplastics from organic debris, then stain them to make them visible under a microscope. But for air samples, collected on filters in fieldwork, wet prep can dissolve lightweight microplastics like polyester, so dry prep is the only option: you brush the filter with a dry nylon swab to collect particles, or use a dry air jet to dislodge them from the filter, no liquids at all. Even here, though, dry prep has flaws: if you brush too hard, you can scratch the filter or break microplastics into fragments too small to count, leading to undercounting. Wet prep, meanwhile, can introduce contamination from the detergent or water itself—microplastics that leach from plastic containers into your sample. That’s why we recently started selling pre-tested, zero-contamination water and detergent kits for wet microplastic prep, because even when you choose wet, you need to account for its weaknesses.
Another common area of confusion: turnaround time and cost. A lot of lab managers assume dry prep is faster and cheaper, but that’s not always true. Let’s go back to histology: a standard FFPE wet prep workflow takes 12 to 24 hours total, from biopsy to stained slide. Dry cryo-prep takes 2 to 4 hours, which is great for intraoperative needs, but the dry equipment itself costs 3 to 5 times more than a standard wet tissue processor. For labs that process 50 biopsies a day, the cost of a dry processor isn’t worth the speed gain, even if it’s faster per sample. Conversely, a metallurgy lab processing 200 metal samples a week will save thousands of dollars a year in repeat tests by switching to dry prep for reactive metals, even if each sample takes 10 minutes longer to prep than a wet ground sample. The difference between wet and dry isn’t about which is better—it’s about which fits your specific use case.
I’ve also learned over the years that the line between wet and dry isn’t always black and white. There’s a middle ground, called “semi-dry” prep, that combines elements of both to mitigate weaknesses of each. For example, when preparing bone samples for histology, wet prep with formalin will decalcify the bone too slowly, while dry grinding is too abrasive and can destroy delicate bone cells. Semi-dry prep uses a small amount of acidic solution sprayed directly onto the grinding wheel, just enough to soften the bone without damaging cells, eliminating both the autolysis risk of all-dry prep and the slow decalcification of full wet prep. I worked with a veterinary pathology lab in Florida that developed their own semi-dry workflow for bird bone samples, and we now supply custom spray systems to match their exact flow rate, so they don’t waste solution or damage samples. That’s the kind of solution you only get when you stop thinking of wet and dry as opposing options, and start thinking of them as tools in your toolbox.
Let’s address a common myth I hear all the time: “Wet prep is only for fragile biological samples, dry is for tough materials.” That’s outdated. Take semiconductor manufacturing, where prep is critical for testing wafer defects before chips are made. Wafer samples are silicon, which is hard, but even tiny scratches or contamination can ruin a $10,000 wafer. Early wafer prep used wet etching, where liquid acid dissolved away excess silicon, but the acid would etch unevenly, leading to defective test results. Now, most semiconductor fabs use dry plasma etching, where a reactive gas (no liquid) is ionized to etch the wafer at the molecular level, creating perfectly uniform surfaces. The speed and precision is unmatched for this application, proving that dry prep isn’t just for metals or plastics—it’s used in cutting-edge tech that powers our phones and computers. Conversely, I recently worked with a semiconductor lab that needed to test the packaging material around a wafer, a soft polymer that would melt if processed in dry plasma. They used a wet prep workflow with a buffered solution that didn’t damage the polymer, so they could test how well it insulated the wafer. So even in the same lab, you’ll see both wet and dry prep being used, depending on what part of the sample you’re testing.
So, to circle back to the original question: what’s the real difference between wet and dry specimen preparation? It’s not just the presence of a liquid. It’s how the liquid (or lack thereof) interacts with your sample’s structure, composition, and the test you’re running. Wet prep is fast, penetrates well, is often lower-cost for high-volume workflows, but carries risks of autolysis, corrosion, contamination, and distortion. Dry prep is moisture-free, eliminates liquid-related artifacts, preserves delicate structures, but can be more abrasive, slower for high-volume work, and requires specialized equipment that comes with a higher upfront cost. The best choice depends on your sample type, your testing needs, your throughput, and your budget.
After 12 years working with labs of all sizes—from small community hospitals to Fortune 500 materials companies—I can tell you that the biggest mistake you can make is picking one method and sticking to it no matter what. A few years ago, I met a lab manager who’d invested in a single wet tissue processor because he thought dry prep was too expensive, but he had no idea that 30% of his surgical biopsy samples were being damaged by formalin, leading to misdiagnoses. Now, he uses wet prep for standard biopsies and dry prep for high-risk cancer samples, and his pathology team has a 9% drop in diagnostic errors. Another client, a metallurgist who’d used dry prep exclusively for 5 years, was surprised to learn that his aluminum alloy brake parts were corroding in the field because his dry prep method didn’t reveal the early signs of intergranular corrosion that only showed up in wet-etched samples. Now he uses semi-dry prep for all his aluminum testing.
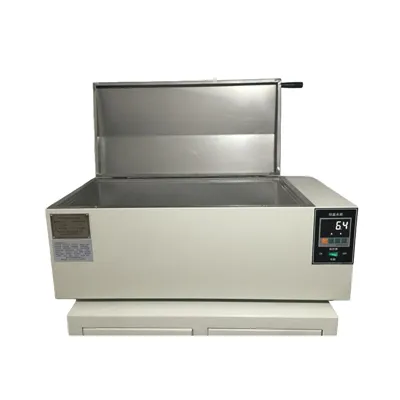
If you’re struggling to decide which method is right for your specimens, or if you’re dealing with recurring issues like artifact-related test failures, high repeat rates, or long turnaround times, I’d encourage you to reach out to our team for a consultation. We work with lab managers, histotechnicians, and materials scientists to assess their specific needs, recommend the right mix of wet and dry prep tools, and even help customize workflows to fit their unique samples. Whether you process biological tissue, industrial metals, environmental microplastics, or semiconductors, we’ve worked with clients across industries to solve their specimen prep challenges. There’s no one-size-fits-all answer to wet vs. dry, but together we can find the solution that works for you.
Testing Machine References:
- Bancroft, J. D., & Gamble, M. (2008). Theory and Practice of Histological Techniques (6th ed.). Churchill Livingstone.
- Metallography and Microstructures. (2004). ASM Handbook (Vol. 9). ASM International.
- Hermsen, J., et al. (2019). “Dry vs. Wet Sample Preparation for Microplastic Analysis in Atmospheric Particulate Matter.” Environmental Science & Technology, 53(12), 6864-6872.
- Cryo-Preparation Techniques for Biological Samples. (2017). Journal of Microscopy, 267(2), 145-158.
Yangzhou Zhengyi Testing Machinery Co., Ltd.
As one of the most professional specimen preparation manufacturers and suppliers in China, we warmly welcome you to buy customized specimen preparation at competitive price from our factory. If you have any enquiry about quotation, please feel free to email us.
Address: No. 66 Zhenxing North Road, Zhenwu Town, Jiangdu District, Yangzhou City, Jiangsu Province
E-mail: 13813156012@163.com
WebSite: https://www.cnzhengyi.com/
